Guide
How to Replace the Supabase URL in Google Sign-In
Replacing the long supabase.co sign-in address with your own domain, step by step.
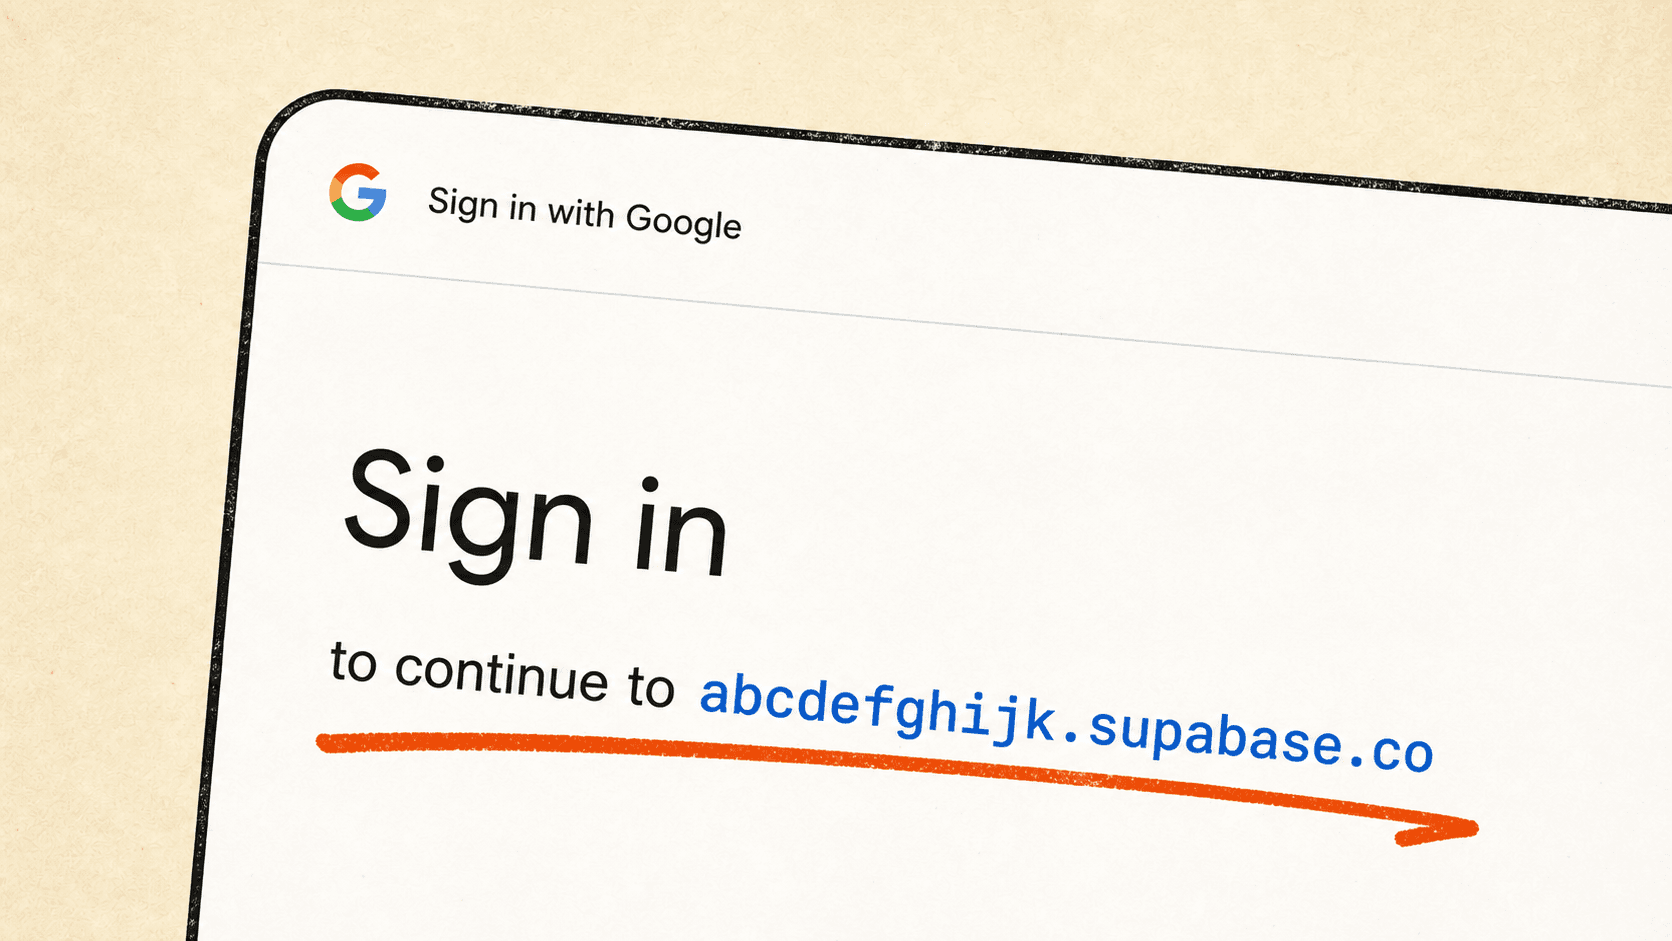
If you see a supabase.co address when testing your "Sign in with Google" screen, also called Google OAuth, your app is showing Supabase's standard sign-in return address. The sign-in return address is where Google puts the key Supabase uses to let your users in.
Supabase calls this link the Auth callback. You can replace it with an app-owned sign-in address such as auth.yourapp.com. Currently, Supabase charges about $10 per month for each project through its Custom Domain add-on.
After setup, your Google OAuth screen will show yourapp.com. While you use an auth.yourapp.com subdomain in the settings, Google only shows the root domain (yourapp.com) on this screen.
Before you startBefore getting started
- Test Sign in with Google using the current sign-in return address.
- Record the current sign-in return address somewhere secure.
- Grab your wallet for Supabase's Custom Domain add-on.
- Start a fresh AI session.
Step 01Pick your subdomain
It's best to use something memorable, like auth.yourapp.com.
It's easy to track.
Step 02Purchase the Custom Domain add-on
- Open the Supabase Dashboard (opens in a new tab).
- Select the project for the app you are changing. Your projects appear as cards on the dashboard.
- Select Project Settings using the gear icon.
- Select Add-ons.
- Open Custom domain.
The Custom domain add-on appears inside Supabase's Add-ons page. - Select the $10-per-month option.
- Select Confirm.
If Supabase asks you to upgrade
Complete the paid-plan upgrade first. Then return to Custom domain and finish purchasing the add-on.
Step 03Add your subdomain to Supabase
Now, you can add the subdomain you picked to your project's Custom Domains settings. Here's how to get there:
Still in Project Settings from Step 2? Continue at 04.
- Open the Supabase Dashboard (opens in a new tab).
- Select the project for the app you are changing.
- Select Project Settings using the gear icon.
- Select General.
- Scroll to Custom domains.
- In the Add a custom domain box, enter auth.yourapp.com.
- Do not include https:// or /auth/v1/callback.
- Keep this page open for the next step.
To go there directly, replace YOUR_PROJECT_REF in this link with your Supabase project's ID:
https://supabase.com/dashboard/project/YOUR_PROJECT_REF/settings/general#custom-domainsSupabase also calls this ID the project ref.
The ID is the first part of your standard Supabase sign-in return address. If your return address is abcdefghijk.supabase.co, your ID is abcdefghijk, and your direct navigation link is:
https://supabase.com/dashboard/project/abcdefghijk/settings/general#custom-domainsSupabase will show a CNAME record. A CNAME record points auth.yourapp.com to your Supabase project.
Step 04Add the required DNS records where you bought your domain
The instructions that connect auth.yourapp.com to your Supabase project are called DNS records.
Most people manage these records where they bought their domain. If you moved the domain's nameservers elsewhere, use the company that now manages its domain records.
Start with the CNAME record Supabase showed in Step 3.
After you add the CNAME record and select Add in Supabase, Supabase will show one or more TXT records. A TXT record adds a verification code to your domain settings so Supabase can confirm that you own the subdomain.
The records below are examples. Copy the exact names and values from your own Supabase project.
- Add the exact CNAME record Supabase provides.
- Return to the Supabase page you kept open and select Add.
- Add every TXT record exactly as Supabase shows it.
- Return to Supabase when the records are saved.
How to add the records in Vercel
Use these steps if Vercel manages your domain's records.
For auth.yourapp.com, Vercel will normally expect auth in the Name field.
For a full record such as _acme-challenge.auth.yourapp.com, Vercel will normally expect _acme-challenge.auth. Vercel adds yourapp.com automatically.
Add these records in the domain's records area. Do not add auth.yourapp.com to your Vercel project as another website domain. This subdomain needs to point to Supabase.
- Open your Vercel team dashboard (opens in a new tab).
- Select Domains.
- Open yourapp.com.
- Find DNS Records.
- Select Add Record.
In Vercel, enter each record from Supabase in the matching Name, Type, and Value fields. - Choose the record type Supabase requested.
- Enter the Name and Value.
- Leave the TTL at its default value.
- Save the record.
- Repeat these steps for every record Supabase shows.
Step 05Verify the subdomain works in Supabase
Before you can proceed, Supabase needs to make sure that you indeed own your subdomain and that it points to the correct Supabase project.
Still on the Supabase Custom Domains page? Continue at 06.
- Open the Supabase Dashboard (opens in a new tab).
- Select the project for the app you are changing.
- Select Project Settings using the gear icon.
- Select General.
- Scroll to Custom domains.
- Compare every record shown by Supabase with the records you added.
- Select Verify.
- If Supabase shows another required record, add it and select Verify again.
- Continue when the screen advances to Enable your custom domain.
What Supabase is verifying
Supabase is checking that you indeed own the subdomain, that it points to the correct project, and that the address can open securely through HTTPS.
These updates often appear within a few minutes, but they can take longer. Supabase says its secure-certificate step can take up to 30 minutes after it sees the records.
Get your new sign-in return address
When verification finishes, your new sign-in return address will be:
https://auth.yourapp.com/auth/v1/callbackSupabase does not create another random address. It adds the standard callback path to the subdomain you selected.
The address is not active yet. Google needs to accept it first.
Step 06Give Google your Supabase sign-in return address
Open Google Auth Platform (opens in a new tab) and select the same Google Cloud project already used by your working sign-in flow.
Before you activate the custom domain in Supabase, add the new sign-in return address to Google. If you activate first and Google does not already know that address, sign-in can fail with a redirect_uri_mismatch error.
The correct web client is the one that already contains your working Supabase address:
https://YOUR_PROJECT_REF.supabase.co/auth/v1/callbackGoogle calls the list of sign-in return addresses Authorized redirect URIs.
- Select Clients.
- Open the existing client with the type Web application.
- Find Authorized redirect URIs.
A Doogle example: keep the working Supabase return address and add the new custom return address beneath it. - Select Add URI.
- Paste the new sign-in return address.
https://auth.yourapp.com/auth/v1/callback - Keep the old Supabase return address in the list.
- Save the client.
Make sure the address matches exactly
Google requires the return address to match exactly. Check the https part, hostname, path, capitalization, and trailing slash.
Step 07Activate your custom domain in Supabase
Still have the Supabase Custom Domains page open? Continue at 06.
- Open the Supabase Dashboard (opens in a new tab).
- Select your project.
- Select Project Settings using the gear icon.
- Select General.
- Scroll to Custom domains.
- Select Activate.
- Confirm by selecting Activate again.
- Wait for Supabase to finish.
- Confirm that this appears as the active custom domain:
auth.yourapp.com
What stays the same
Keep the CNAME record in your DNS settings. It is what keeps the address connected to Supabase.
Your app can continue using its existing Supabase project URL. You do not need to change the app's code to complete this Google sign-in update.
After activation, Supabase's Google provider settings should show:
https://auth.yourapp.com/auth/v1/callbackStep 08Test Sign in with Google again
Sign out of your app completely. You can also use a private browser window to avoid reusing an existing sign-in.
- Open your public app.
- Select Sign in with Google.
- Check the domain displayed by Google.
- Confirm that it now shows yourapp.com instead of the long supabase.co domain.
A finished example: Doogle's Google sign-in screen shows doogle.dog. - Choose your Google account.
- Confirm that you return to the correct page in your app.
- Confirm that the app recognizes you as signed in.
- Reload the page and confirm that you remain signed in.
- Sign out.
Why Google only shows yourapp.com
Google only shows the root domain on this screen. That is why you see yourapp.com, even though the complete Supabase address is auth.yourapp.com.
Step 09Save your important information somewhere secure
Save a short setup note containing:
- Your Supabase project name
- Your project ID, also called the project ref
- Your custom subdomain
- Your original Supabase sign-in return address
- Your new sign-in return address
- The domain records supplied by Supabase
- The result of your final Sign in with Google test
Keep secrets out of this note
Do not save passwords, secret keys such as API keys, access tokens, Google client secrets, or Supabase service-role keys in this note.
TroubleshootingWhat to do if something goes wrong
Most problems in this setup come from one value being missing or entered in the wrong place.
Supabase says Unable to enable custom domain on a Free Plan
Upgrade to a paid Supabase plan. Then open the Supabase Dashboard (opens in a new tab), select your project, open Project Settings, select Add-ons, and open Custom domain.
If an AI tool shows entitlement_required, it normally means the Custom Domain add-on is not enabled for that project.
Supabase says custom hostname does not CNAME to this zone
Check that:
- The record type is CNAME.
- Its Name points to your chosen subdomain.
- Its Value matches the project address supplied by Supabase.
- Its Value does not contain https:// or /auth/v1/callback.
- Your domain provider did not add yourapp.com twice.
Supabase cannot verify the domain records
Compare every TXT record character by character.
Some domain providers automatically add your root domain. They may expect _acme-challenge.auth instead of _acme-challenge.auth.yourapp.com.
Correct the record, wait for the update, and select Verify again.
Supabase says Validation timed out
Confirm that the records are correct and select Verify again.
If Supabase says the secure certificate is still being prepared, wait a few minutes before checking again.
Supabase shows a CAA error
If Supabase shows a CAA error, add the exact record Supabase provides or ask your domain provider for help.
Google shows redirect_uri_mismatch
Open the existing Google web client and compare https://auth.yourapp.com/auth/v1/callback character by character.
Make sure the address is under Authorized redirect URIs, not Authorized JavaScript origins.
Google still shows the long supabase.co domain
- Confirm that auth.yourapp.com is active in Supabase.
- Confirm that you changed the Google web client used by this app.
- Confirm that your app uses the same Supabase project you changed.
- Start the test while fully signed out.
- Begin a new Sign in with Google attempt.
Still having trouble?
Pull me into your project with @Vlad, your virtual co-founder. Or, if you'd rather work with the real me, set up a call.
Behind the guideHow this guide started
While testing my Google sign-in flow for Doogle, I noticed that the Sign in with Google page showed a very long and weird word in the bottom-left of the screen.
I asked Google Gemini what it was, and it said it was my Supabase sign-in return address.
I tried asking Claude to help, but its walkthrough was too complicated. I couldn't really understand any of it.
So, I spent some time going back and forth with Claude, asking it to explain what it was talking about.
After figuring it out, I decided to break it down in a way that people who aren't developers could understand.
The resultSummary
You started with a working Google sign-in flow that showed a Supabase address.
Now the return address belongs to your app: https://auth.yourapp.com/auth/v1/callback
Supabase created and activated the custom address. Your domain records connected it to the project. Google accepted it as a return address.
Once the final test works, you are done. Google can show yourapp.com instead of the long supabase.co domain, and people can still sign in as before.

Vladislav Zhirnov
Quick answersCommon questions
Why does Google show yourapp.com instead of auth.yourapp.com?
Google only shows the root domain on this screen. Supabase still uses the complete auth.yourapp.com address behind it.
Is my Supabase project ID a secret?
No. The project ID appears in your public Supabase address. Your API secrets, service-role key, access tokens, and Google client secret must remain private.
Do I need to change the Supabase URL in my app?
Not for the Google sign-in change covered here. Supabase says the original project domain continues working after the custom domain is activated.
Should I remove the old Supabase return address from Google?
No. Keep it while completing and testing this change.
Sources
6 references- Supabase Custom Domains (opens in a new tab)supabase.com
- Supabase Custom Domain usage and pricing (opens in a new tab)supabase.com
- Supabase Login with Google (opens in a new tab)supabase.com
- Google OAuth client settings (opens in a new tab)support.google.com
- Google OAuth redirect-address rules (opens in a new tab)developers.google.com
- Vercel domain record management (opens in a new tab)vercel.com
Choose your next move